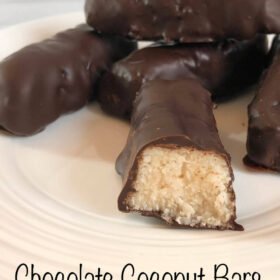
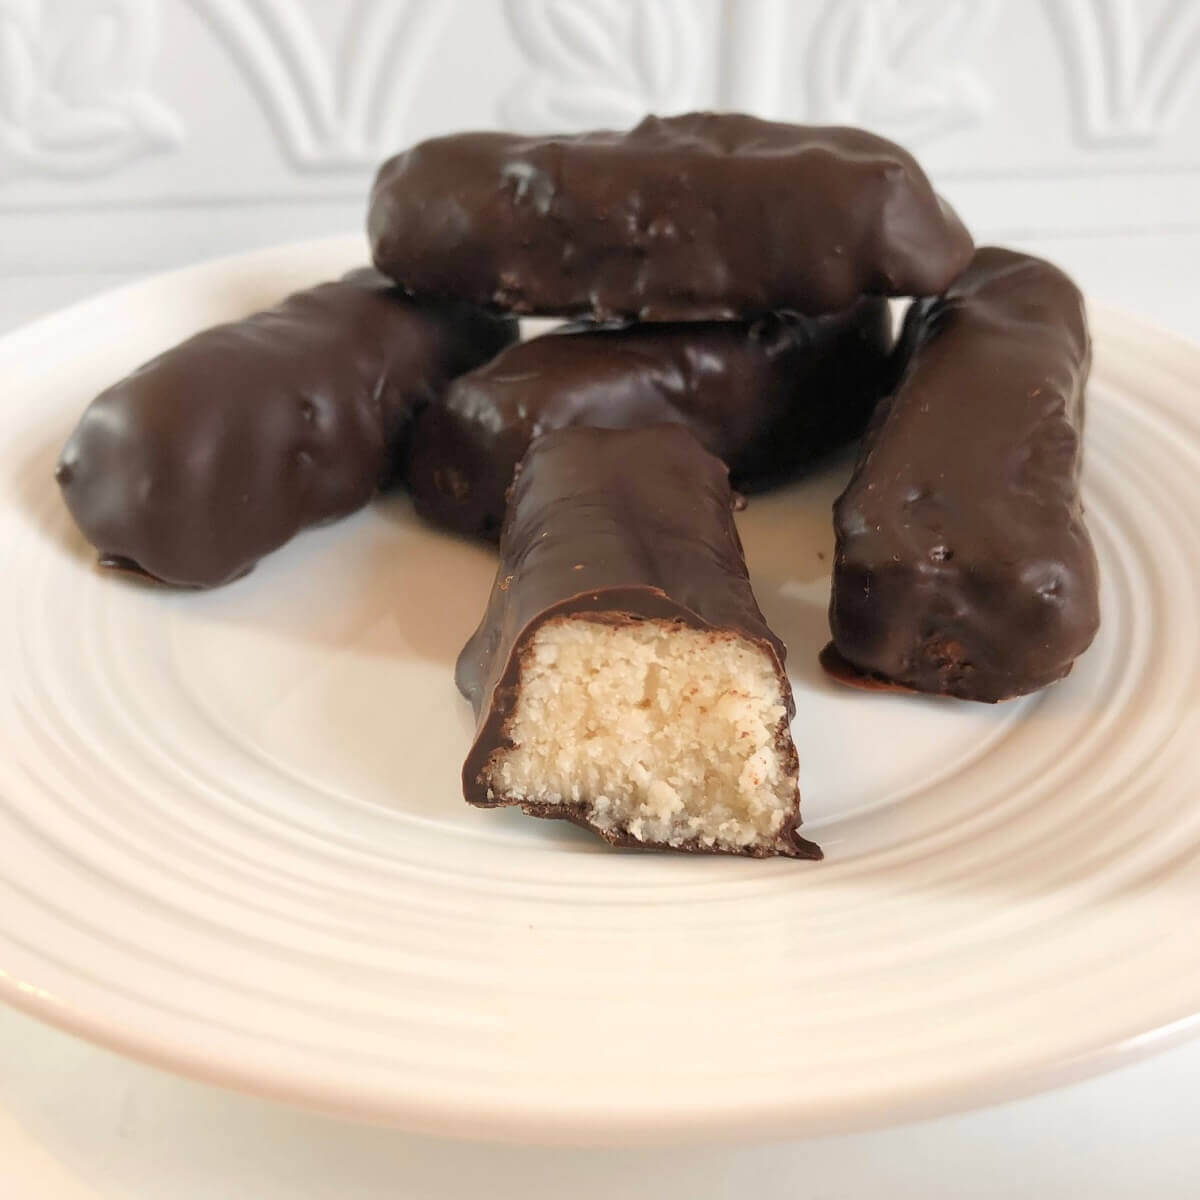
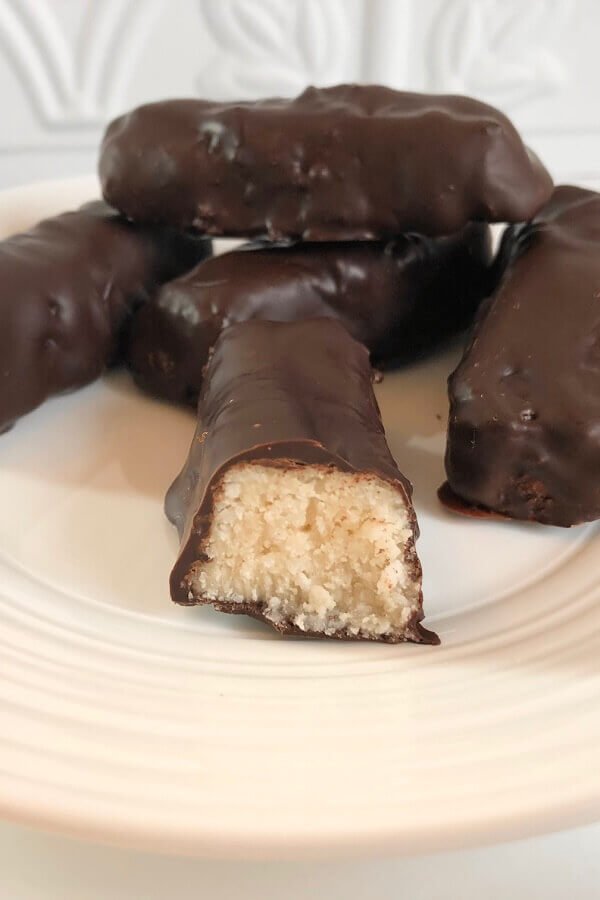
These coconut candy bars are a delicious gluten-free, grain-free, and nut-free treat. They’re perfect when you’re craving the combination of chocolate and coconut. These chocolate covered coconut bars are a tasty addition to any sweet table and also make great homemade Halloween treats. This recipe is easy to make and kid approved too.
What to serve with these coconut candy bars
If you’re serving these treats at a party and would like to add another tasty option to the mix, try these chocolate strawberry truffles. They’re easy to make and perfect for entertaining.
Ingredients and substitutions
These coconut candy bars are made with shredded coconut. Be sure that the coconut you’re using is unsweetened otherwise these will turn out too sweet.
This recipe calls for dark chocolate. You can use whichever variety of chocolate suits your diet and palate. There are many vegan and paleo dark chocolate options to choose from these days, particularly if you’re shopping online.
I like to use dark chocolate with a high percentage of cocoa solids because those varieties tend to contain very little added sugar.
These treats are sweetened with maple syrup but you can substitute agave if you prefer.
This coconut candy bar recipe calls for vanilla extract. Be sure to use pure vanilla extract as opposed to artificial vanilla if possible because the difference in flavor is noticeable.
How to make them
These treats are quick and easy to whip up. Start by melting the dark chocolate. I prefer to take the easy route and do this in the microwave but you can melt it in a pot on the stove set to low heat if you prefer. Just stir it constantly until melted and watch carefully to make sure it doesn’t burn.
If you’re using the microwave, a foolproof method is to break up the chocolate into pieces or roughly chop it, add it to a microwave safe bowl, then heat it for 20 seconds on high power, stir, then repeat until it’s melted. Be sure to stir every 20 seconds.
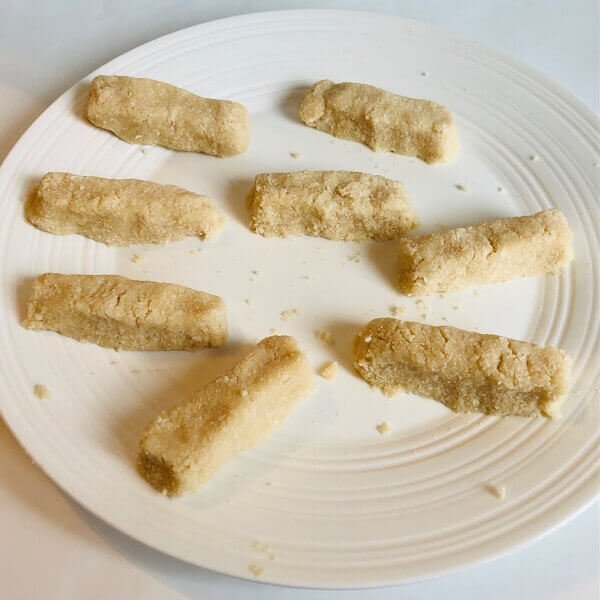
Once the dark chocolate is melted, set it aside and make the coconut mixture. Add the shredded coconut, maple syrup, vanilla extract, and salt to a food processor or high powered blender and process until it becomes sticky and dough-like.
Use your hands to form the coconut mixture into bar shapes. You can start by dividing the coconut “dough” into roughly 8 portions, then squeeze them into an oblong shape in your hands. Then you can place them on a plate and use your fingers to press the sides into a more rectangular bar shape.
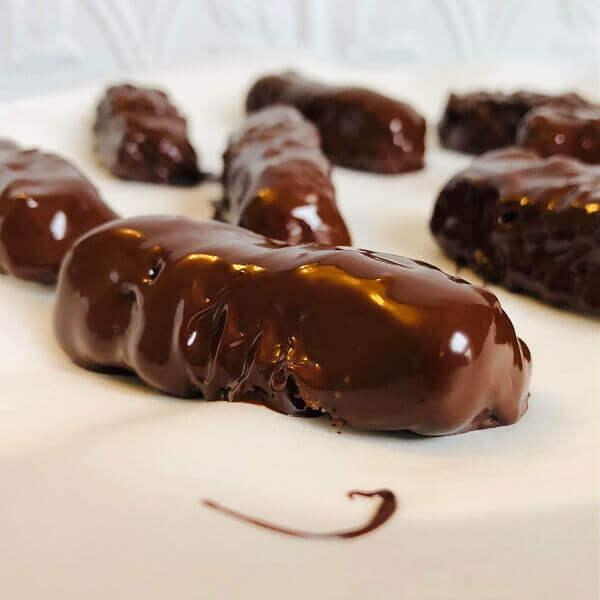
Next it’s time to dip the coconut bars, one at a time, in the melted chocolate. I like to use two forks to gently lift the bars and place them in the chocolate. Gently roll them around a bit to ensure all sides are coated, allow any excess chocolate to drip back into the bowl, then place them on a piece of parchment paper on a plate.
Refrigerate for at least 30 minutes before serving.
Storage
Store these coconut chocolate bars in the fridge for up to seven days. You can serve them straight out of the fridge or at room temperature.
Optional additions
For a delicious flavor boost, add 1 teaspoon of freshly grated lime zest or orange zest to the coconut mixture before blending it.
Giving these as gifts
These coconut candy bars make great homemade gifts. They’re perfect for Christmas gifts, host gifts, Valentine’s Day gifts, or teacher’s gifts. Just place them in a nice box, tin, or cellophane bag and add a pretty ribbon. You can also form these treats into smaller ball shapes instead of bars to make truffle style chocolate coconut candies if you prefer. This will make the recipe stretch a bit farther which is nice if you’re giving them as a gift.
More easy recipes to try
- These blackberry chocolate clusters contain only two ingredients and are perfect for summer entertaining.
- These caramelized almonds have the perfect balance of sweet and salty flavors.
- These yummy homemade chickpea flour tortillas are delicious stuffed with veggies and hummus.
- This no-knead, vegan whole wheat bread recipe is easy to make and mess free.
Coconut Candy Bars Recipe
Equipment
- Food processor or high powered blender.
Ingredients
- 1 1/4 cups unsweetened shredded coconut
- 3.5 ounces dark chocolate
- 1/4 cup maple syrup
- 1 teaspoon pure vanilla extract
- Pinch of salt
Instructions
- Break the dark chocolate into pieces (or roughly chop it) then add it to a microwave safe bowl.
- Melt the chocolate by microwaving it on high power at 20 second increments, stirring it every 20 seconds until it is melted, then set it aside to cool.
- Add the unsweetened shredded coconut, maple syrup, vanilla extract, and salt to a food processor or high powered blender.
- Process until a sticky, dough-like texture is a achieved (this should take a minute or two).
- Remove the coconut "dough" from the food processor and divide it into roughly 8 portions.
- Use your hands to form that mixture into bar shapes.
- Dip a bar in the melted chocolate, ensuring all sides are well coated in chocolate, then place it on a piece of parchment paper on a plate (I like to use two forks to dip the bars in the melted chocolate and allow any extra chocolate to drip back into the bowl). Repeat with the rest of the bars.
- Refrigerate for at least 30 minutes to allow the chocolate coating to harden before serving.
Notes
- Store these coconut candy bars in the fridge for up to seven days.
- Optional addition: add 1 teaspoon of freshly grated lime zest or orange zest to the food processor before blending up the coconut mixture.